Galentine’s Day | Exploring Pasadena, CA

“Galentine’s Day?”, you may be asking.  What exactly is Galentine’s Day?  Well that’s the same question I had when I noticed that hash tag trending in IG – so I looked it up!

Season 2 of Parks and Recs can be credited for starting the trend.  Galentine’s Day is celebrated on February 13th, the day before Valentine’s.  According to Wikia, Galentine’s Day is the best day of the year.  It is a day to celebrate your female friendships and it’s basically an excuse to pamper yourselves and have a girls day out.

Armed with excessive FOMO (fear of missing out), my cousin and I set up our Galentine’s date and set out to explore Pasadena.

We started out the day with intentions to do brunch at Urth Caffe.  If you checked out my ‘Breakfast in Southern California’ post, you probably have a good idea of just how amazing breakfast at Urth Caffe is.

Well, things didn’t turn out quite as planned and we missed the breakfast menu.  But that didn’t stop us from enjoying our “brunch”.  We ordered a green tea boba, morrocan tea boba (which tastes like a minty green tea), a chicken pesto salad, and sprout sandwich.

Urth Caffe Chicken Pesto Salad SmallUrth Cafe Sprout Sandwhich

Our lunch options did not disappoint.  The lunch at Urth Caffe is just as good as the breakfast.

Urth Caffe

Did I mention it was my cousin’s birthday?  The main reason for celebration of course!  (Although a Galentine’s Day celebration is also a good excuse.)

Following our lunch, we ventured out to old town Pasadena, one of my favorite places for people watching and window shopping.  We were pleasantly surprised to find an interactive art installation in One Colorado.  It was entitled “Heart Strings”.  Guests were encouraged to take a heart and write a message of love or declaration for an admirer and pin it to strings that were hung from wooden posts.

I was so excited when @EnjoyPasadena re-posted my photo on their Instagram account!

Heart Strings Pasadena

Following our stroll we decided to stop by POP Champagne & Dessert Bar for some bubbly.  It’s not a true brunch unless champagne is involved.  😉

We wrapped up our day with milky buns from AFTERS ice cream.  What is a milky bun you may ask?  Only the most amazing deliciousness wrapped in a donut!

Milky Bun Cookie Butter

At AFTERS, we shared a glazed milky bun with cookie butter ice cream and mochi.  Nom nom nom.  Let me tell you, it was delicious.

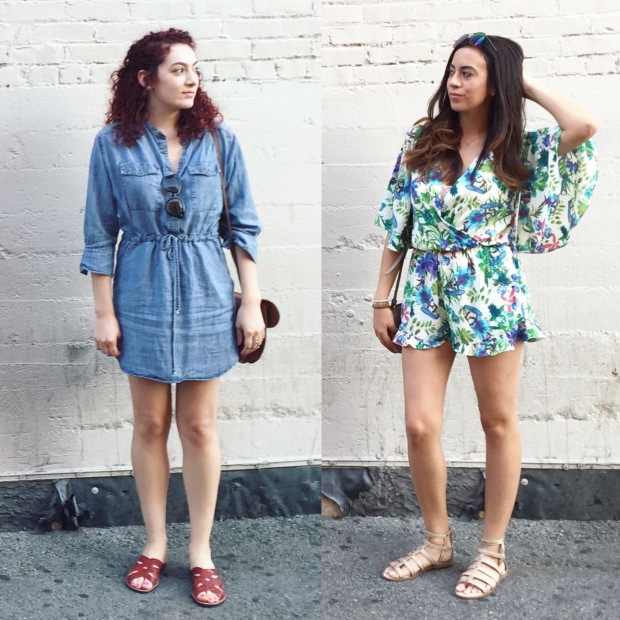
Oh, I almost forgot. We also managed to squeeze in a photo shoot before the sun went down. That OOTD post still to come. 😉

OOTD

Let me know if enjoyed this Galentine’s Day post by liking and commenting below!


XOXO

Follow me on Instagram!

Instagram

DIY | Ombre Nail Tutorial

Happy Thursday Lovlies! I’m so excited to bring you this DIY ombré nail tutorial designed by my cousin, just in time for Valentine’s day. 💕  My cousin describes this look as a Lana del Rey inspired edgy romantic style.  Cue “Young and Beautiful“, this beautiful ombré effect is so simple to do!  The look is meant to be a little messy which makes the application that much easier.  The gradient pink of this DIY helps to draw attention towards the tip of the nails, without being overly dramatic.  Oh, and did you notice the little gold heart detail?  A little detail that others can’t notice from afar, but you’ll know, since it’s a heart just for you.  😘

DIY Ombré nail tutorial

Pair this nail style with something comfy but cute.  Our #OOTD is a pale pink romantic sweater paired with jeggings and combat boots, to add a edgy vibe.  A simple white clutch completes this look with a pair of rings.


DIY | Ombre Nail Design


What you’ll need

  • White nail polish
  • Two shades of pink nail polish (One brighter than the other)
  • Gold nail polish
  • Eye-shadow sponge
  • Small piece of aluminum foil
  • Nail art dotting tool
  • Nail polish remover
  • Q-tips

How to

  1. Start with the white nail polish to set the base for your design.  Apply two thin coats and allow to completely dry before moving to Step 2.
  2. Apply a drop of the lighter pink polish on a piece of aluminum foil.
  3. Dab your sponge in the polish from Step 2 and sponge on (lightly stippling) to cover 3/4 of your nail, starting from the tip; let completely dry before moving on to Step 4.
  4. Using the same technique from Steps 2 & 3 apply the brightest shade of pink polish to 1/4 of the nail, starting from the tip, adding color until you build the desired intensity.  Allow to completely dry.  You can either stop here and skip to Step 6 or add the heart design.
  5. Heart Design: Using the dotting tool, add two dots of the gold nail polish side by side leaving a small space in between.  Drag the two dots downward at an angle, connecting each end to form a heart.
  6. Use a q-tip soaked in nail polish remover to remove excess polish.
  7. Seal the design with a clear top coat.
  8. Repeat on the rest of your nails.

Tips

  • Start with clean nails.
  • Do one hand at a time.
  • In order to avoid muddy colors, allow the polish to completely dry before moving to the next step.
  • Dampen the sponge with water to avoid over saturation.  This also helps for smoother application.
  • In order to avoid making a mess, dot the nail polish on aluminum foil or a wax plate instead of paper.  Nail polish will soak through paper and could potentially leave a mess.
  • Don’t have a dotting tool?  Make your own by sticking a pin in the eraser end of a pencil.
  • For the heart design, work quickly to make your connecting lines before the dots dry.

XOXO

Follow me on Instagram!

Instagram