
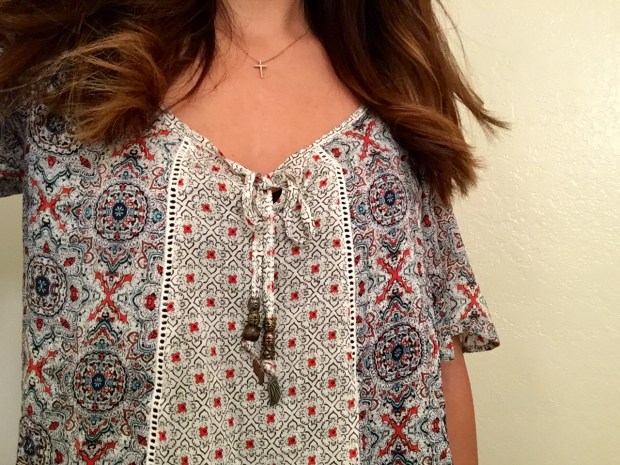
Do you have an attention to detail? Like the type of attention where if you see a simple shirt with pearl buttons lining the back, you have to have that shirt because of the button detail. Don’t worry, you are not alone. Here’s a super easy DIY for adding detail and updating a front tie shirt to help with your addiction. 🙂
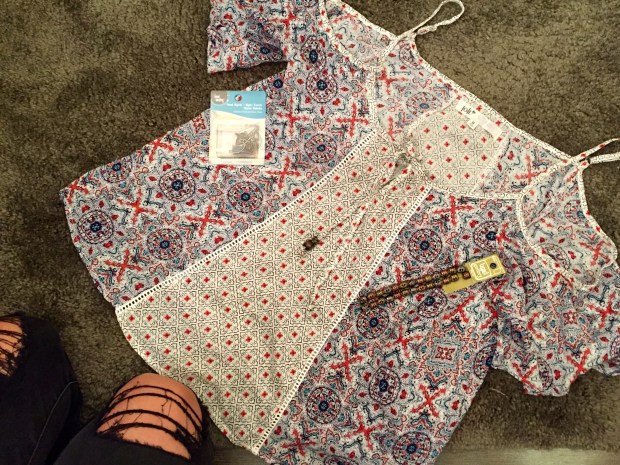
I recently purchased this cold shoulder 70s style shirt by Jolt with an awesome wooden bead detail on the front ties. So I was pretty bummed to loose beading on one side after just a few wears. I had to fix this detail issue asap!


I went to Micheal’s and purchased jewelry beads with bead holes large enough to string through the front ties and small angel wing charms to sew on to the ends. The beauty with updating your clothes is that you get a chance to add a bit of your personality and to be as creative as you want.


DIY: UPDATING YOUR FRONT TIE SHIRT
What you need
- Front Tie Shirt
- Jewelry Beads
- Crochet Hook
- Optional: Small Charms, Sewing Needle, and Thread
How to
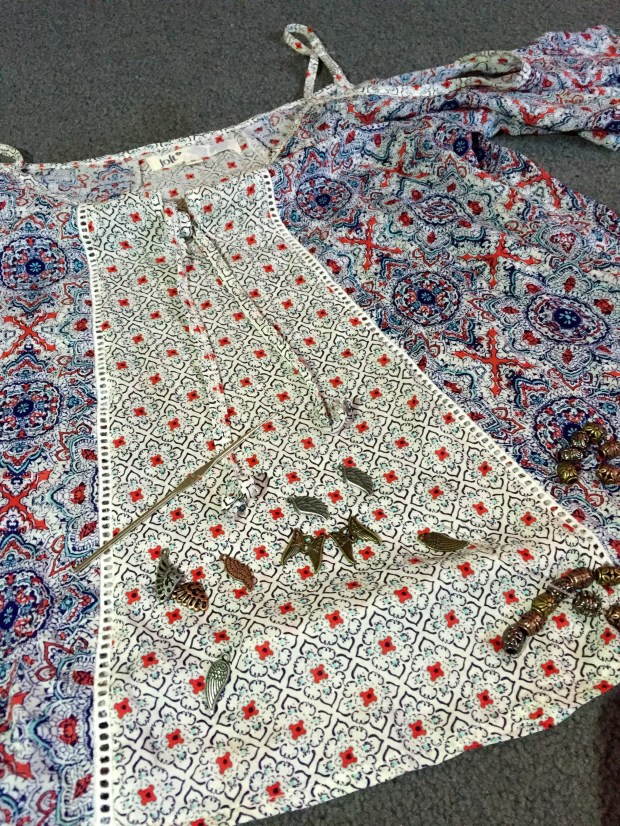
- Organize your beads in the order you want them displayed before starting.
- Add the beads from top order to bottom on to each tie, utilizing the crochet hook to push the tie through.
- Double knot the ends to secure the beading in place.
- Optional: Sew on charms to the ends for added security.

Tips
If your shirt is machine washable, pick beading that won’t easily damage with a wash. Wooden charms would actually work best, but for added care hand wash and hang or lay flat to dry.
If you add glass pieces, throw your shirt in a pillow case when putting in the wash. The pillow case will add protection to minimize damage to the beads.

I’m so trying this all out 🙂 btw I really enjoy viewing your blog! Maybe you might enjoy mine at
http://Www.laluafashion.com
LikeLiked by 1 person
Awesome! I’m glad to hear ☺️ Thank you for reading. Love your blog. Great style!
LikeLike